
Step-by-step guide to connect Gmail with Email Trader and secure your alerts.
Connect Gmail to Email Trader, and manage alerts step by step
By the end of this tutorial, you’ll have Email Trader linked to a dedicated Gmail inbox, alerts flowing reliably into the app, and rules in place so no signal is ever lost in spam. The flow is designed for simplicity, security, and peace of mind.
💡 Good to know: Email Trader doesn’t “scrape” your inbox. It only reads messages that match the alert format (JSON with tags). Everything else is ignored. Your private emails remain untouched.
Prerequisites
-
Gmail account — preferably a dedicated one (see Step 1).
-
Email Trader app — installed from the Mac App Store or Microsoft Store.
-
Active subscription — required to enable inbox monitoring (first week free).
-
Stable internet connection — Email Trader checks your inbox continuously in the background.
Step 1 — Create a dedicated Gmail address
We strongly recommend creating a Gmail address used only for Email Trader.
Why?
-
Keeps your main inbox clean.
-
Avoids performance overhead when parsing large inboxes.
-
Adds a layer of security: if the address is secret, only your alert provider can send to it.
👉 Example: mytradingalertsKGV765@gmail.com
Step 2 — Authorize Gmail via OAuth 2.0
In Email Trader, go to Settings → Inbox Tab → Gmail address field and sign in.
-
Select your dedicated Gmail.
-
Confirm the OAuth2.0 prompt: check “View your email messages and settings”.
-
Done.
🔐 Good to know: OAuth 2.0 means you never give your password to Email Trader. Google issues a token, which you can revoke anytime in your Google Account security settings.

Watch how to pair a Gmail account with Email Trader
Step 3 — Configure Gmail rules
Alerts are only useful if they always land where they belong.
In Gmail → Settings → Filters and blocked addresses, create a filter that applies to your alert sender.
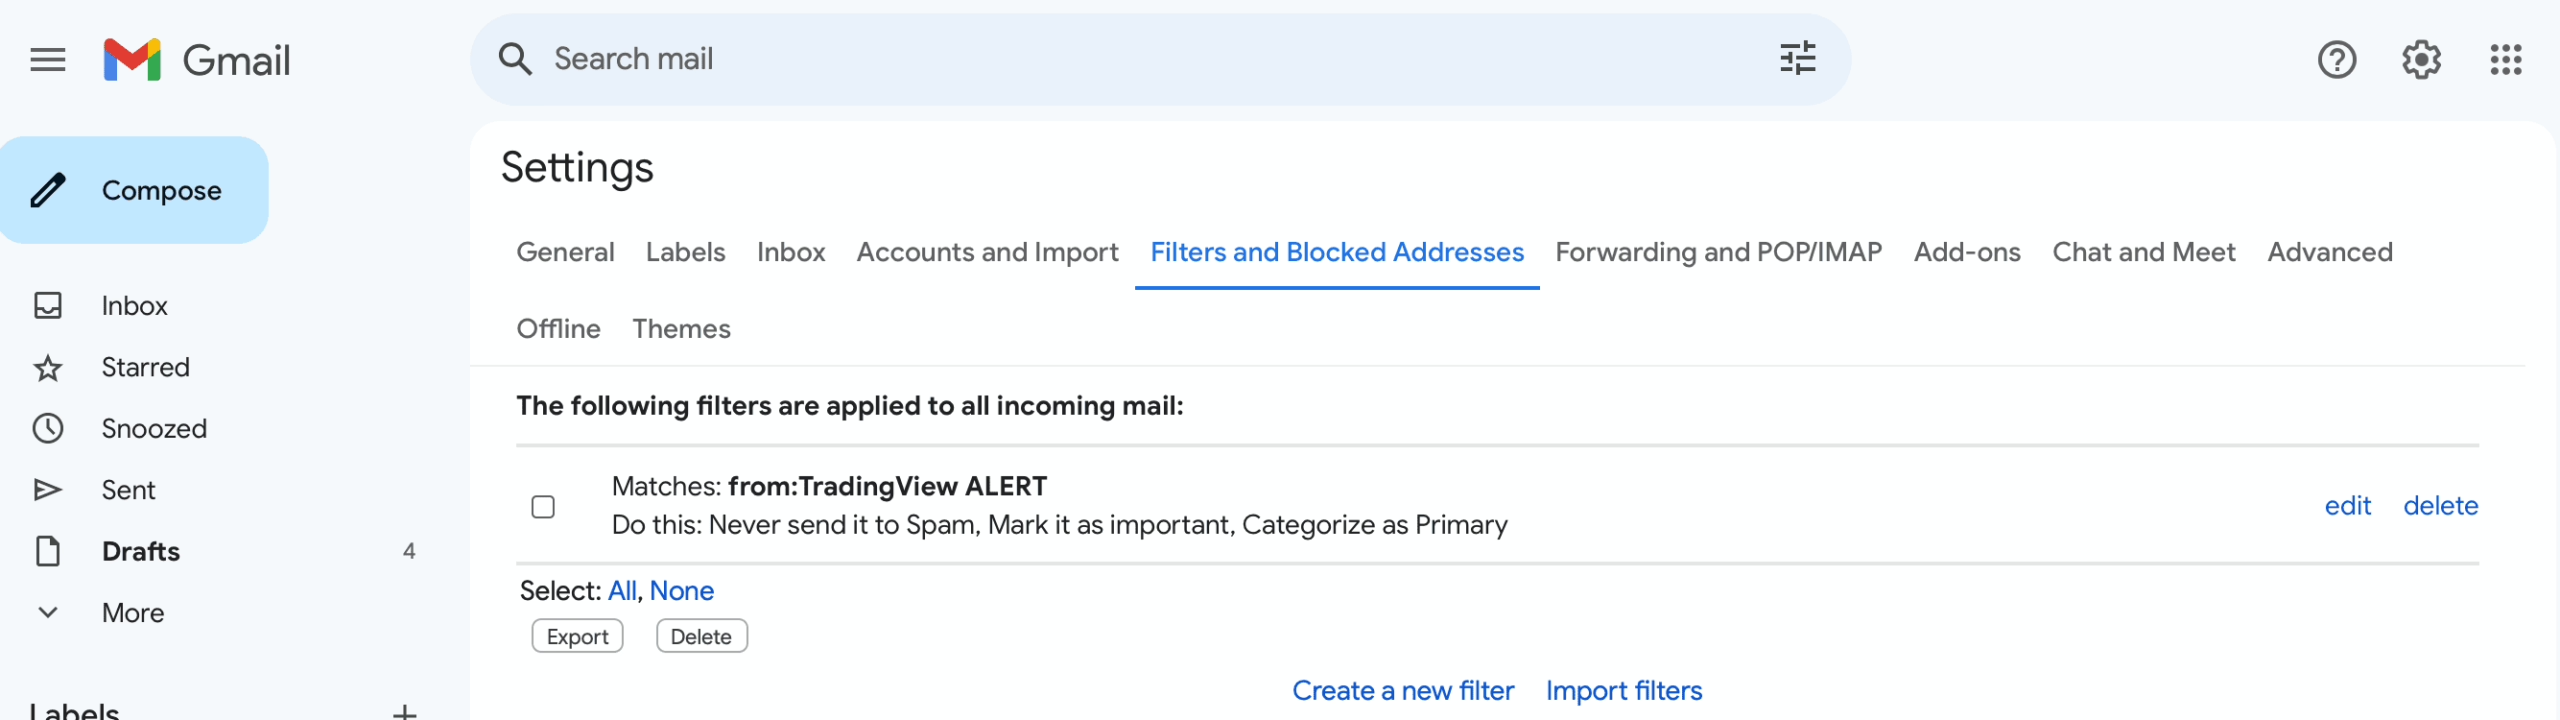
Example of Gmail filter: mark trading alerts from TradingView as important, never send to spam, and categorize as Primary.
Recommended actions:
-
✅ Never send it to spam
-
✅ Always mark it as important
-
✅ Categorize as Primary
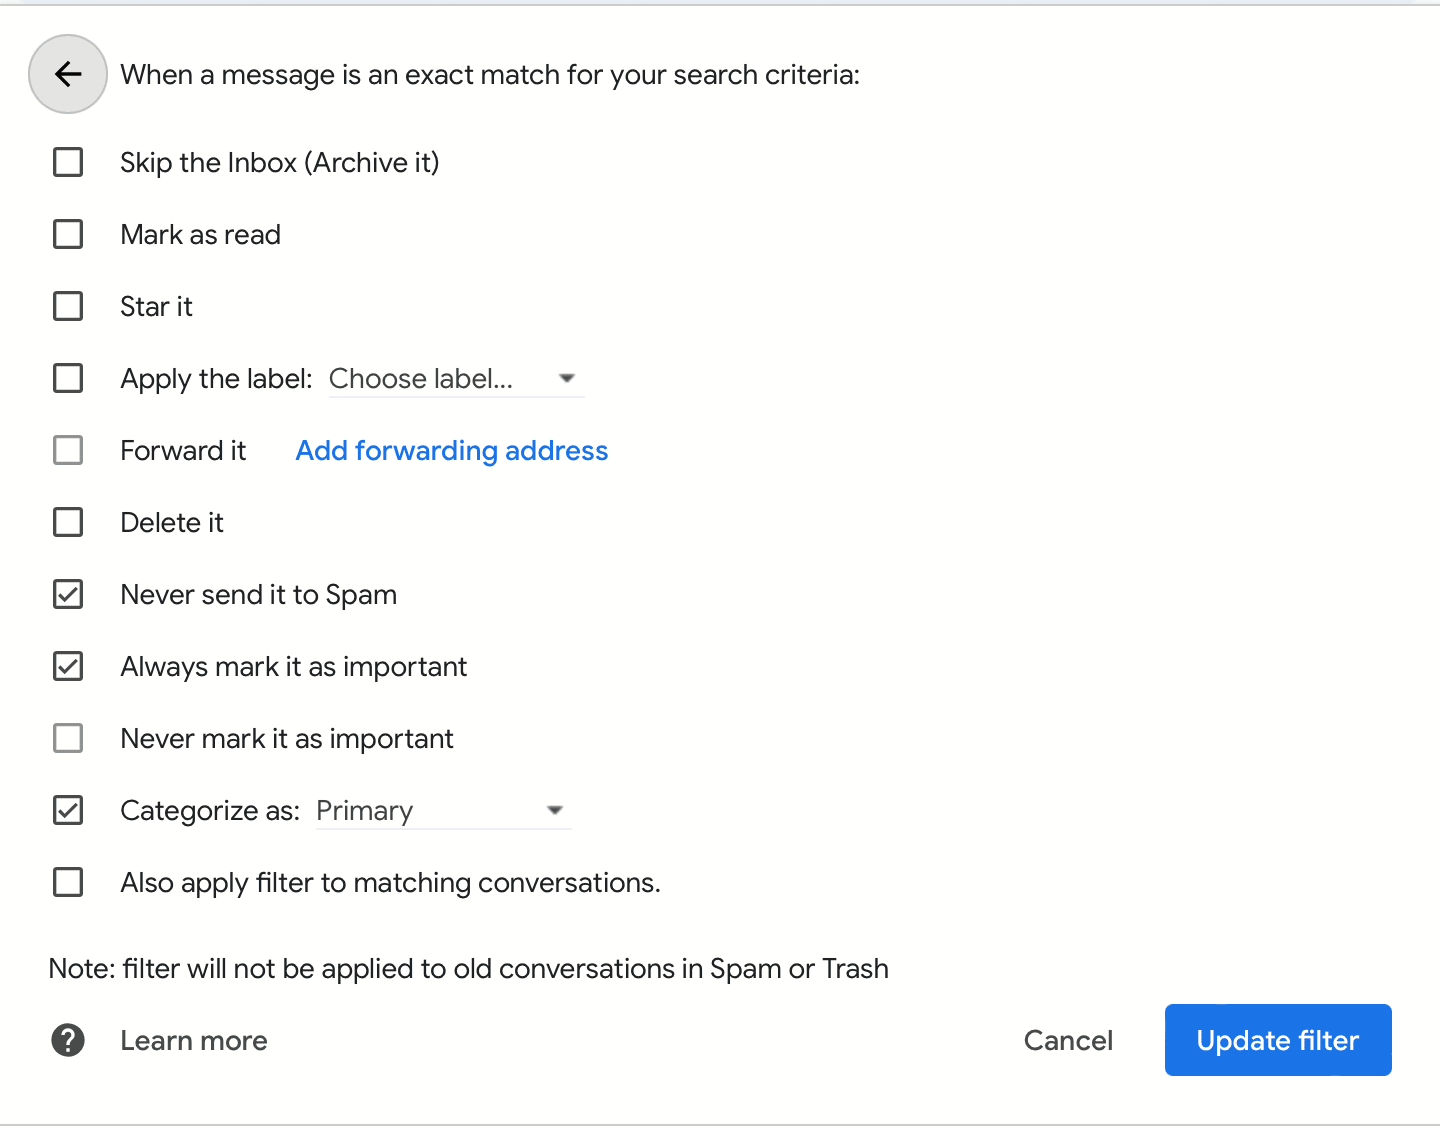
Recommended Gmail filter settings: never send trading alerts to spam, always mark as important, categorize as Primary.
Step 4 — How Email Trader reads alerts
Email Trader only scans the content of emails containing JSON tags in the expected format.
-
Non-alert emails → ignored.
-
Alert emails → parsed, order created, sent to IBKR.
-
Minimal storage → only a small identifier may be logged.
📜 Transparency: Email Trader logs show every alert processed and every order created. Nothing happens “in the dark.”
Step 5 — Activate inbox (subscription required)
To start reading Gmail, Email Trader requires an active subscription.
-
First week free.
-
After that: flat low-cost monthly fee.
-
Cancel anytime — no lock-in.
👉 You’ll see in the log:
Subscription active.
Step 6 — Test alerts end-to-end
Once Gmail is connected and the subscription is active, send a test alert (for example from TradingView, by setting-up an alert, or more simply by sending an email with a Json alert copied from the one of the models).
-
Watch Email Trader logs → “Alert received .. /… order sent.”
-
Verify in IBKR (paper account first) that the order appears.
The big picture
Where other automation tools require complex integrations, API keys, or external servers, Email Trader works with just Gmail + IBKR.
-
Simplicity: a Gmail login, one or two filters, and you’re done.
-
Security: OAuth2.0, local parsing, no third-party relay.
-
Transparency: logs you can inspect anytime.
📺 YouTube playlist: More detailed videos about “Email Trader settings” and “Json alerts” are available on the Email Trader channel.
✅ This concludes the 3-part Setup Guide:
-
Part 3 — Gmail & alerts (this article)
The final objective of this series is simple but powerful: to take you from a trading signal to an executed order at IBKR in one smooth flow — secure, simple, and low-cost.